Showing posts with label My Cooking Adventures. Show all posts

Sunday, May 5, 2013

My daughter's 2nd birthday!

It is so hard to believe that my daughter is 2 years old already, it feels like just yesterday when I was bringing her home as a new mommy. Life has been crazy wonderful.

So my daughter is a funny little thing. She doesn't like cookies, cakes or sweets in general. However, if you give her bacon or potato chips, and she is a happy camper. {that's not all I feed my daughter- I promise} I was trying to be a bit creative when it comes to her birthday cake. There is a weakness for one type of sweetness and of course I turned to that when it came to her "cake"
 
 That's right, it's a Krispy Kreme Tower. 
I'll tell you what, easy to assemble, easy to "cut", and easy clean up, it was a perfect faux cake! And she absolutely love it!

 Cheers to my baby girl!

Saturday, July 28, 2012

Chicken Quesadilla

I have to admit.... this is one of my favorite meals at the moment! Totally hits the spot if you are looking for a tasty Mexican meal.
Ingredients:
  • 2 lbs of Boneless Skinless Chicken
  • 10 oz. package of Saffron Rice
  • 1 package of medium flour tortillas
  • 1 Green Pepper
  • 1 can of Mexican Lime and Cilantro Rotel
  • 2 tbs of Taco Seasoning
  • 3 oz. of Cream Cheese (softened)
  • 8 oz of Monterrey Jack Cheese
  • 1 tbs. melted butter
 Onto the pictures! 
First off, start the rice per the instructions on the package. Once that is going, dice up the chicken. Two lbs of boneless skinless chicken was three chicken breasts.
 Closeup of what the pieces look like.
 Cook on medium heat. When the chicken is about halfway done, add the taco seasoning and the Rotel.
 Yay! Rice is done!
 Finely dice up the green pepper. I do not cook the pepper because I enjoy that fresh crisp in the mixture. Adds to the texture.
 Once the chicken is done, put the chicken mixture into a mixing bowl. Add the green pepper and 1 cup of the rice. The rest can be used as a side dish.
Once mixed,  you can add the cheese and cream cheese. I know, it may not look very pretty, but believe me- it's tasty!

 Butter one side of two tortillas, then place about 1-1 1/2 cup of the mixture on one of the tortillas. Butter sides will be facing out. (Secret: use low carb tortilla shells to help on the carb front!)
 Place on a Panini Press for a minute or two.
  Other great additions to this would be black beans and onions.
 Enjoy!

Wednesday, July 11, 2012

Toddler Lunch- Spinach Grilled Cheese with Homemade Fries

I can now relate to mommy's who struggle to get their toddlers to eat healthy meals. The biggest battle that I fight now is that she won't eat fruits. She loves fruit purees, but she won't eat them otherwise. (I will gladly accept any ideas)

I have found a way to sneak spinach into her sandwich and I am pretty ecstatic about that. Along with that, I have made some homemade French fries because my daughter loves the potato in all forms. At least this way, it's baked and not fried.
 Ingredients: One russet potato, olive oil, kosher salt, pepper, Italian seasoning
To get a cut similar to a French fry, I used a mandolin slicer. If you have never used one before, they are EXTREMELY sharp. Please use the hand guard you see below to make sure you do this safely.
Nice looking fries!
 Place the fries in a bowl and drizzle a little olive oil on them. About two teaspoons, it does not take much. Then I would season them with a little salt and pepper, and finally a pinch of Italian Season for a bit of flavor.

 Spread out on a cookie sheet lined with Parchment Paper and pop in the oven 400 for about 45 mins until golden brown.
For the spinach grilled cheese, I wouldn't start it until the fries are 5-7 minutes out, this does not take long to cook. I used a honey whole grain bread, organic spinach and provolone cheese.
After I washed a few leaves (about 5 or so) and removed the stems, I chopped them up pretty fine. That is so she can bite through it and not pull out a full piece of spinach. 
 Sprinkle the spinach on the cheese.

Place the sandwich on a Panini press. I do not add butter to the bread, no need for her to have that greasy fat. Watch carefully, this doesn't take more than a minute or two to cook.
 Minus the crust, of course.
Lunch is done! You will notice the fries are not real crispy. I pulled them out earlier because my little one is teething and I didn't want her to have anything real super crunchy. (Not shown is this cut into toddler bite size pieces)
 A face every mother likes to see!

Saturday, August 8, 2009

My Three New Friends!

Ah, I feel so much better after my long vent from last night! The good thing that came from it, is that I now have the motivation to pick myself back up and study again. I have been away from it for a long time and it is about time that I finish what I started. Thank you to everyone who took the time to read it, I know that it wasn't pretty! lol I went ahead and deleted it though. It didn't show my best side. lol :-)

So here I am with a new recipe that is a lot of fun! But should really only be enjoyed on a bad day, because Ladies, it is not healthy! But man, is it delicious! I call it my "3 Guys Pie."
Ingredients:

2 Pints of Ben & Jerry's Stephen Colbert Ice Cream (hence the 3 Guys)
1 Premade Chocolate Graham Cracker Crust 9"
1 12oz. box of Waffle Cones
1 7.25oz Container of Magic Shell Chocolate Flavored

Let the ice cream sit out for 15-20 minutes or so. It needs to be soft enough so that you can spread the ice cream around in the pie crust. My ice cream was soft by the time that I got home from the store so it might not take that long.

While that is softening, take all of the cones and break them up into small pieces. As seen below:
Simple pimple to assemble. Spread the ice cream all over the pie. Be careful not to eat ALL portions of the carmel, it is hard to resist. Place the pie back in the freezer for 2-4 hours. You are looking for the ice cream to harden again. After it is frozen, you can do the topping. Take the magic shell and cover the top of the pie. Then sprinkle the cone pieces over the top of the chocolate. Finally top the cones with the left over chocolate shell. Place in the freezer for 15 minutes to allow for the shell to harden.

Cut, serve, and enjoy! Do not get on the scales for the next 5 days!!! But guarentee to brighten any bad day!!! :-) And this is Chris' hand! He couldn't wait another 2 seconds for me to take this picture!

Monday, July 20, 2009

Girl's first pie!

Ah, I’m back Ladies! Missed you all! Well, an apple pie with a lattice crust is Chris’ favorite so I decided to see if I could whip one together for a surprise for him after a long week of traveling for work. I have never made a pie before, but I am so happy with how it turned out! And he was constantly raving with how good it was. Looks like it is a winner! And if a newbie like myself can pull this off, anyone can do it!!Pie Crusts (yields the bottom and top crusts for a 9” pie pan)-

12 Tablespoons of unsalted Butter (1 ½ sticks)
3 Cups of all purpose Flour
1 Teaspoon of Sea or Kosher Salt
1 Tablespoon of Sugar
1/3 Cup of very cold Vegetable Shortening
1/2 Cup of ice cold Water


Filling-

½ Cup of unsalted Butter
2 Tablespoons of all purpose Flour
1 Tablespoon of Corn Starch
¼ Cup of Water
¾ Cup of White Sugar
¾ Cup of packed Brown Sugar
1 Teaspoon of Nutmeg
1 Teaspoon of Cinnamon
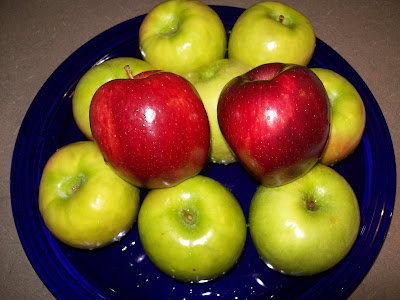
5 Granny Smith Apples
2 Red Delicious Apples

Place the shortening, butter and water in the freezer about 30 minutes before starting so that it is extra cold. When you are ready to start, dice up the butter and then put it back into the fridge while you are putting the mixture together. Add the flour, salt and sugar into the food processor and pulse a few times. Then add the butter and the shortening and start pulsing the processor. Continue to pulse while slowly adding the water in the feed tube until the dough starts balling up. Dump it out onto the board, roll into a ball, wrap in saran wrap and refrigerate for 30 minutes.

Preheat the oven to 350 degrees Fahrenheit. Melt the butter in a sauce pan over medium heat. Once melted, add the flour, corn starch and stir into the mixture to make a paste. Add the rest of the ingredients, stir, bring to a boil and then lower the heat and let simmer.

Peel, core and cut up the apples and place in a mixture of water and lemon juice to keep the apples from browning. Once the apples are cut, it is about time to pull the dough out and start making the crust. Cut the dough in half one half will be for the crust and the other half will be the lattice crust top. Dust the board and rolling pin with flour so that the dough does not stick. Always roll out from the center of the dough. Before placing the bottom crust in the pan, be sure to spray the pie pan with a nonstick spray (I forgot this one).

Drain the water from the apples. Take ¾ of the syrup and pour over the apples. Fold mixture into the apples to make sure that they are all coated evenly. Fill the pie pan with apples and mound them slightly, they will cook down.
Roll out the other half of the dough. Cut into ½ or ¾ inch strips depending on how thick that you want the strips to be. Start with placing a strip down the center of the pie. Next, place sever strips perpendicular to the center strip alternating on top or on bottom of the center strip. Continue to add strips in the basket weave pattern. Trim extra dough from the edges of the pan and pinch the dough together.

Take the final bit of the syrup and brush it onto the top crust. Then sprinkle the cinnamon all over the pie. Your pie is ready to bake! Oven should be at 350 degrees and should bake for 50-55 minutes. With 10 minutes remaining, brush a milk wash over the top.

Put the pie in the fridge and let it sit overnight so that the filling will have an opportunity to firm up. Next day cut, heat up and enjoy!!

LinkWithin

Blog Widget by LinkWithin